Eureka Sand Dunes - Death Valley
The Eureka Sand Dunes in Death Valley are huge. Some up to 750′ tall. Getting there however requires 43 miles of bone shaking dirt road.
The Eureka Dunes
There are several dune fields in Death Valley. Mesquite Flats is the most popular and probably most accessible. As a result there are plenty of people there every day and the dunes are very tracked up. Fine if you want to spend an afternoon hiking in the dunes. Bad if you want landscape images of pristine dunes. We spent an afternoon there trying to find some compositions of untracked dunes but couldn’t find any. If you visit these right after a windstorm maybe you’d have a chance of finding some without footprints. So we studied the maps looking for some more remote dune fields.
Eureka dunes is quite far from the popular lodging areas of Furnace Creek and Stovepipe Wells. It’s up in the northwest section of the park and to reach it requires driving 43 miles of some pretty bad washboard dirt road. They are also accessible from Big Pine, CA if you happen to be in the Eastern Sierra. If you were only interested in the Eureka Dunes and not the rest of Death Valley then definitely access them from Big Pine. Some of the road is actually paved and won’t be so hard on your vehicle and your kidneys.
Our planning for the Dune Shoot
Since the road to the Eureka dunes is at the northern part of the Park, we decided to relocate our campsite to the Mesquite Springs campground to serve as our base camp. This is one of the NPS dry campgrounds meaning there are no hookups. You’re off the grid. In this particular case there’s no cell service either. Pretty hard to maintain an online presence with no internet but we wanted some dune photographs with no tracks in them. So you have to go where the people aren’t.
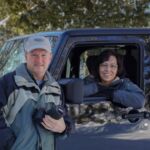
The 43 mile trip down the dirt road takes about 2.5 hours. You can’t go very fast because of the washboard road. It’s also very dusty so the faster you go the more of a dust cloud you kick up. Since we knew we wanted to shoot in the last light of the day to get nice shadows across the dunes, we decided that we should spend the night there rather than navigate the dirt road back in the dark. Not having a tent, we opted for sleeping in the back of the Jeep. Outfitted with an air mattress it’s not too bad. We picked up a back packing cook stove and some freeze dried meals and we were good to go.
Making the Photograph
Once we arrived at the dunes, we looked for an access point that didn’t have any people already there. Eureka Dunes is no where near as visited as Mesquite Flats but there were still a couple cars there when we arrived. We drove to the east side of the dunes via a very rough two track road that requires a high clearance vehicle like our Jeep. There was no one on this side so it looked pretty good. It would require a 20 minute hike to reach the base of the dunes but it was easy walking.
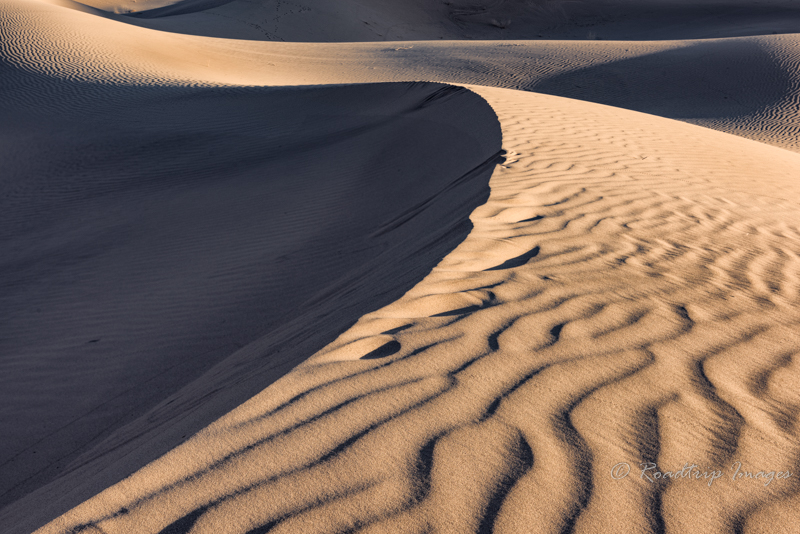
When we reached the sand, I stood for a minute just studying things. I didn’t want to track it all up. I was looking for a nice curved ridge line, preferable an S curve if we could find one. We cautiously started up one of the smaller dunes to get a better look. In the end we walked pretty far into the dunes and accessed a couple tall ones to survey the ridge lines for the shapes I was looking for. As the light was getting pretty low I finally found what looked like a nice composition.
I knew I wanted some near foreground in the image preferably with some wavy sand. I found those along with a nice curved ridge line. It also needed to run mostly north and south so the setting sun would cast shadows across the ripples and the ridge line. With the camera and tripod set up it was clear that I’d need to do some focus stacking to get the entire image sharp, front to back. I ended up taking three images and blending them together. One focused on the near ground right by the tripod. A second image focused on the mid-ground about half way down the ridge line. And a third one focused on the dunes in the background.
I took several series of focused stacked images as the light was getting more and more golden. I kept shooting right until the sun dipped behind the mountain range to the west. Then it was time to head back to the Jeep for some dinner.
Post Processing the Image
I ended up selecting the last series of images while we still had full sun. Once the sun was partially behind the mountain, the distinct shadows I was looking for were gone. I did the normal image correcting in Lightroom and synchronized the series so that they were as close to each other as possible. I then exported them into Photoshop. Each of the three focus stacked images were loaded as a separate layer. The near ground was loaded as the base layer, then the mid-ground and finally the background. I then created a mask for the mid-ground and the background layers and blacked them out. Using the brush tool I painted in the mid-ground to create a smooth transition from near-ground to mid-ground. I did the same with the background. This took a few iterations to get it the way I wanted it but it’s easy to just create a new mask and try again.
When the blending was done I grouped these into a folder named “focus stack” and went on to image enhancements. One of the big issues that needed to be corrected was the blue cast in the shadows. Your eye doesn’t see it in the field but most shadows actually have a fair amount of skylight in them or they’d be totally black. Well, skylight is very blue. This doesn’t look right in the photograph so it needs to be color corrected. The image also needed a fair bit of contrast to highlight the minor shadows among the ripples in the sand. Some final light balancing across the photograph and it was pretty much done.
Final Thoughts
Although the trip to Eureka Dunes took a toll on both the Jeep and us, I came away with a sand dune image I’m happy with. Camping out in the Jeep was an adventure and boy does it get cold in the desert at night! It was nice getting back to the motor home the next day to some relative comfort. It just goes to show that sometimes you have to go to greater lengths to get an image. Especially if you want no footprints in it!
As always, you can see higher resolution images on our Facebook page. Please give us a like while you’re there.
Nikon D810 with Nikkor 24-70mm at 50mm. f/11 at 1/13 sec. ISO 64.
Subscribe and Get Free E-Book!


Comments are closed.