Yavapai Point Sunrise (And How to Shoot Pano's)
Sunrise & sunset in the Grand Canyon can bring some wonderful light. Yavapai Point is a great location to experience it…

Yavapai Point and Shooting Pano's
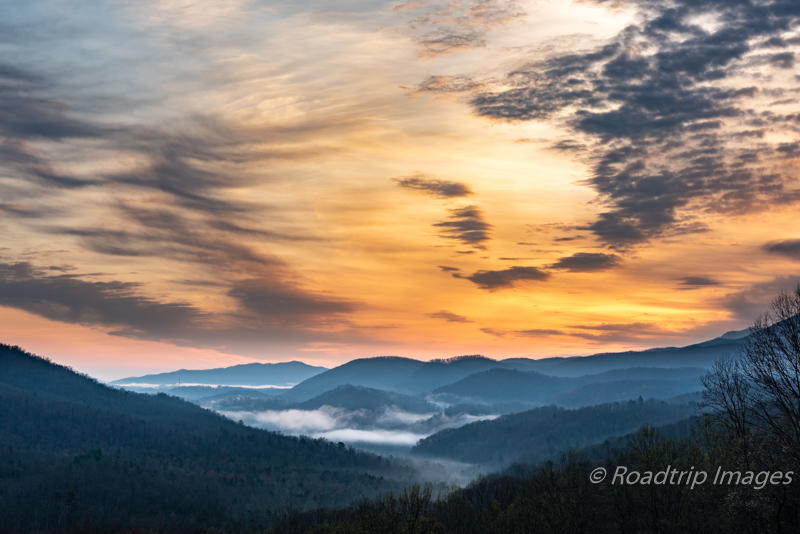
The south rim of the Grand Canyon has plenty of overlooks to shoot from. Yavapai Point is one of the better ones in my opinion. It affords a nice wide view, perfect for panoramas (more on that later). There is a geology museum there and to the left of the museum are any number of vantage points. In early morning light the various canyons catch the rays of the sun and just glow with wonderful warm color. If you’re in luck, there will be some mist hanging in the valleys like there was on this morning. Much different from mid-day when the sun is high overhead and washing out all the color in the rock walls. The golden hour is your friend here.
Plan on getting here well before sunrise to stake out your position, especially if it’s during the busy season. For that very reason I like coming here during the off season of fall and winter. Far fewer people. Be prepared for some chilly mornings but that adds to the atmosphere as well.
To create a panorama with your digital camera you’ll need several images to stitch together. You could keep the camera set up in landscape mode (horizontal) and shoot 3-4 images. These can then be merged together in Lightroom to make a pano. The downside is that the resultant file would be limited by the vertical resolution of each horizontal image. In my case with a Nikon D810, the raw file resolution is 4912 pixels x 7360 pixels. That would then mean my pano file would 4912 pixels tall by some number of pixels wide. Good but it could be better. Most photographers shoot their pano’s in portrait mode (vertical). They then take 6-10 images and stitch those together. Now the resulting raw file would be 7360 pixels tall by whatever pixels wide. Much more resolution to be able to produce a large, wall size print.
The next critical item is a good, stable tripod. This is a must. There can’t be any movement in the tripod as you’re shooting the individual images. Make sure the tripod is dead level as well. Most of the better tripods have a bubble level built in to help with this. Doing this will help greatly in the stitching process later. Once the tripod is level, mount the camera in the portrait mode on your ball head and make sure it’s level as well. Start at one end of the pano and check all the way to the other ensuring it stays level throughout the entire swing.
The last element is the amount of overlap in each shot. This is a bit of a trial and error procedure but you must ensure there is some overlap in each image for the stitching software to work right. It essentially matches up the duplicate pixels of the overlap portion to properly connect the individual images together. To give you some frame of reference, I shot nine individual frames at 24mm each to create the photograph above. About a 10-15 degree rotation for each image. Use the degree scale on your ball head to make each iteration the same. As a rule of thumb, shoot wider and taller than you want the final image to be. There will some cropping that needs to be done to create the final pano.
Stitching the Images Together
Now that you have the raw files, you’re ready to assemble them into a raw pano file. Using Lightroom, select the 8-10 images and make sure the develop settings are the same. Do any lens corrections, etc before the stitch. I don’t do any other adjustments until I get the pano raw file. In my case, with the nine images selected, I clicked on photo – photo merge – panorama…

This brings up the next screen with several panorama options. The first is what kind of panorama projection you want the software to use. It’s helpful to try all three so that you can see how they each render the pano. The preview box shows what each projection type will look like. I tend to like the spherical projection so that what’s selected here. You can also see that the stitch is not a rectangle yet. That will get fixed in the next step…

The next set of parameters to set is how to make a rectangular image out of the messy looking stitch preview above. There are two options. The first is to do a straight crop which just inserts the largest possible rectangle into the image and removes all the pixels outside the rectangle. To do this, select the auto crop box. It works but it discards a lot of pixels. The second option is to do a little image stretching. Using the boundary warp tool you can have the software stretch or warp the edges of the image to make it into a rectangle. You can control the amount of warp with the slider. I selected 100% for this pano…

Click on the Merge button and Lightroom will then create the panorama. After it finishes it adds the pano file into the library. It will show up to the right of the selection of the individual frames in the image selection panel at the bottom of the screen. You may notice it has a .dng file extension. This is Adobe’s digital negative file format. You can work with it in Lightroom or Photoshop just like the raw files. While in Lightroom you can do any image adjustments that you would normally do to balance the lighting, contrast enhancement, etc. Just remember the resulting file is big! It will take a little longer for your computer to manipulate the image. See the image size below for my pano…

Final Thoughts
I won’t go into the rest of the post processing steps here as they are the same as a normal image except for the file size! It does take awhile to process a file this big. Also in Photoshop there is a 2 GB limit for normal .psd files. Your pano file may be larger than that. If so you’ll need to save it in the .psb or large file format option in Photoshop.
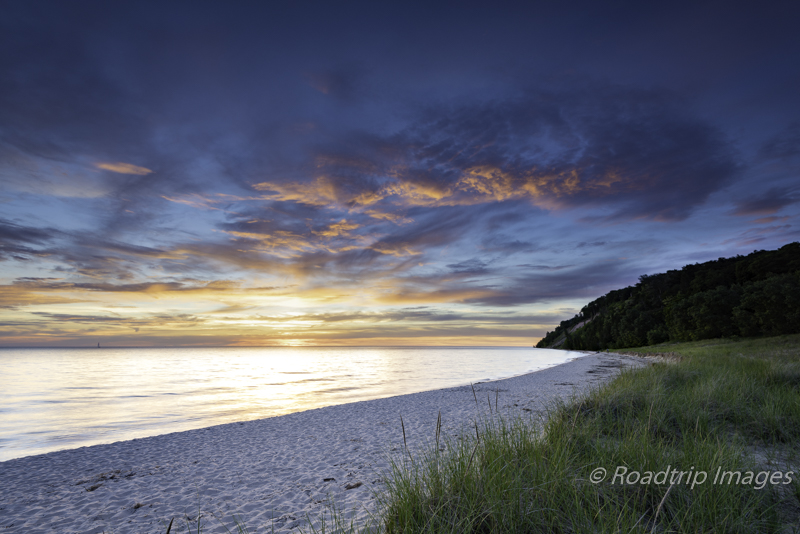
Pano’s are fun to create and they can result in some stunning images. Many times the grand vistas of mountain ranges or the Grand Canyon really work well in the pano format especially when printed big. With some careful setup and a few extra steps in post processing, the results can be amazing.
As always, you can see higher resolution images on our Facebook page. Please give us a like while you’re there.
Nikon D810 with Nikkor 24-70mm at 24mm. f/11 at 1/30 of a second. ISO 64.
Subscribe and Get Free E-Book!