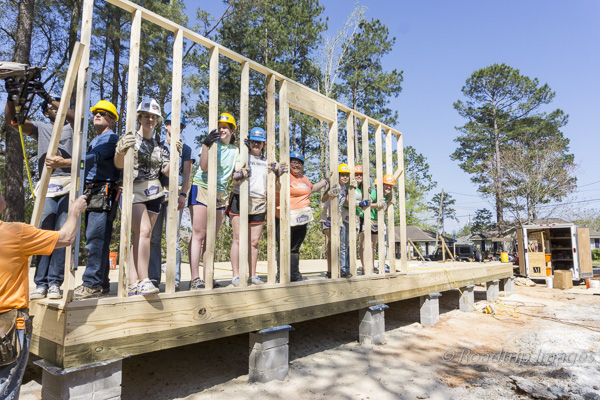
In last week’s post, we got the framing for a new Habitat for Humanity house well under way. This build took place in Louisiana, just north of New Orleans. In part 2, we finish up the walls and work with a new crew. A group of college students associated with the International Orthodox Christian Charities were our partners for the second week. They were from various schools around the country and joined together for a week of volunteering on this Habitat build. They were led by Father Steve. They got to work tying the walls together with what’s called a double top plate. This is a second layer of 2×4’s on top of the existing walls that tie perpendicular walls together. You can see that in the pictures below left and center. This is tedious work and all done on a ladder so it’s slow going. Having a team member at the chop saw helps so they can cut the 2×4’s to the lengths needed by the crew on top the ladders (below right).


Lot’s of double top plate is needed so the crew rotated through the positions (below left). While that was going on Jason, the site supervisor, and I straitened walls and made sure everything was nailed properly (below center). In the rush of putting up walls some of this can get overlooked. Karen and some of the other students took on the task of sheathing the back storage shed below right.


The walls get covered with 4’x8′ sheets of Oriented Strand Board (OSB) and then a 1″ layer of foam insulation (below left & center). Once that is up, a weather resistant barrier (WRB) or house wrap covers it all until the siding is installed. This had to be put on before the storage shed walls could be added.
Once all the walls were taken care of, Jason and I spent some time with the front porch. The floor joists are in and now the porch beams need to be built. We’re laying one of the beams out below right.


The final porch framing is shown in the picture below left. Our attention is now shifted to building the walls for the rear storage shed. These sit on a concrete pad and get fastened to the back of the house. Lots of long studs are needed for the three walls and the crew cuts and stacks them below center. We nail the walls together in preparation for standing them up on the concrete pad below right.


What do you know, it fits! (below left.) The final storage shed is shown below center. We had a good second week with the students from IOCC. We enjoyed working with them and hearing about their adventures exploring the local culture and food. Like the swamp tour, gators and marshmallows! An energetic and hard working group. In the picture below right is the crew for week two.


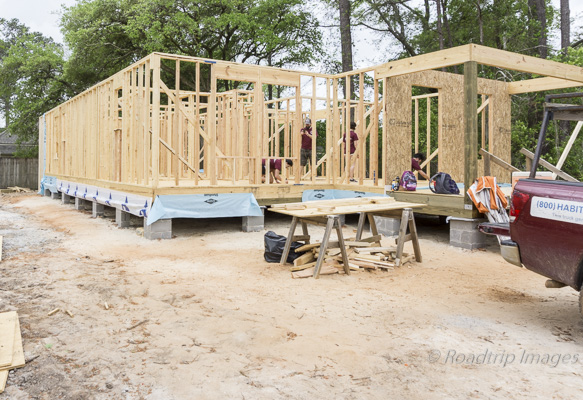
Below left is where we started and below right is where we ended after nine days of hard work. The walls are set and true and the porches and storage shed are built. It’s all set for final sheathing and then trusses which will come the following week. A lot can be accomplished when you have good people set on a worthy task. We thoroughly enjoyed our experience on this build and definitely will do it again.
We’re told a large crew of Air Force cadets will be on hand to do the heavy lifting next week. Sounds like perfect timing for us to move on down the road.