Virginia Falls - Glacier NP
With the smoke from wildfires making photography difficult all over the West, we’ll take a look back at Glacier NP.

Virginia Falls
Virginia Falls doesn’t get the attention it should. It’s on the same trail as St. Mary’s Falls but many people stop once they reach St. Mary’s thinking that’s it. That’s a shame since Virginia Falls is much more picturesque. It’s a 3.6 mile round trip hike so it’s not very strenuous. It is in bear country so take your bear spray. Once there, most people view it from the top of the falls but the far better view requires scrambling down some rocks and boulders to the lower part. Waterfalls look better when you get eye level with them so to speak. I worked my way around some rocks to get out into the river itself to view it head on rather than from the shore.
Shutter Speed and Neutral Density Filters
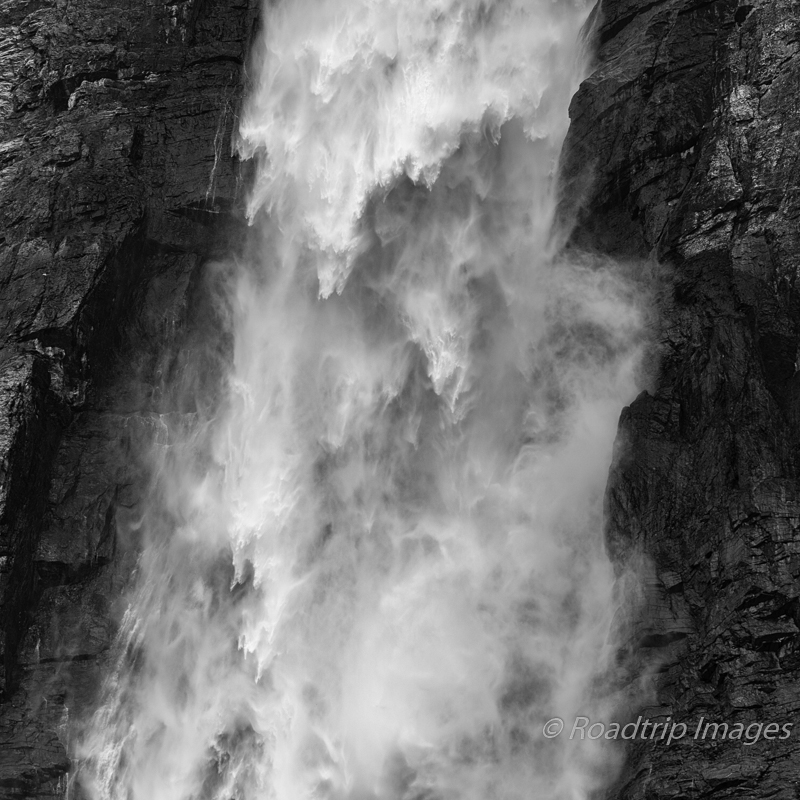
Waterfalls tend to look better when you shoot them with a slow shutter speed. This gives it that silky smooth look. If you freeze the water with a fast shutter speed it looks course and choppy in my opinion. Not the way your mind remembers the scene. How long of a shutter speed comes down to personal taste. For small, delicate waterfalls I find that long shutter speeds of many seconds looks best. 5-10 seconds is about right. Maybe longer to smooth out the pool of water at the base of the falls if that is the look you’re going for. With larger, faster moving water I find these longer shutter speeds smooths it out too much. There’s no texture left to the water since it’s moving so fast. For these I limit the shutter speed to 2 seconds or less. The above photograph is 1.3 seconds for example. This gives the water just enough coarseness that there is still detail in the falls.
So when the light levels are high, how do you get shutter speeds that long you ask? Well you can lower the ISO as far as it goes and close the lens down to f/16 or f/22 but in many cases that’s still not enough. Enter the neutral density filter. Think of these as sunglasses for your lens. It’s a filter that goes on the front of the lens that reduces the amount of light passing through to the sensor. It’s called neutral density because it doesn’t add any color cast to the light passing through. Or at least it shouldn’t. Cheaper filters many times do add a color cast so make sure to get a quality brand. They are commonly measured in how many stops of light they reduce. So a 6 stop ND filter reduces the light levels just like closing the lens down 6 f-stops. Common filters are 4, 6 and 10 stop filters although you can get them in many values. I carry those three with me all the time. They are also measured in ND values with a 4 stop filter having a ND16 value and an optical density of 1.2 just to make things confusing. It’s a mathematical formula that’s tough to remember in the field. I just know I have 4, 6 and 10 stop filters and they are labeled 1.2, 1.8 and 3.0 according to their optical density (or ND16, ND64, and ND1000 respectively).
Another filter commonly used with water is the polarizer. This filter removes the glare and harsh reflections off the surface of the water. It should also be in your backpack. Try it and see if it improves the shot or not. Sometimes it does and sometimes it doesn’t.
Making the Photograph
Shooting waterfalls with direct sunlight can be tricky. The dynamic range can be quite high if there are areas of shadow in the scene. That was the case in the image above. I had direct sunlight on portions of the water as well as areas which were in deep shadow. Too much dynamic range for a single exposure. Anticipating this I bracketed my shots to include some under and some over exposed frames to use later in Photoshop.
For the composition I wanted to include enough of the rocks on the sides of the falls to give the scene some color contrast and also anchor it in place. With all that movement you need some firm ground in there too. I also wanted some of the green forest in the shot but not too much. Just a bit at the top. Finally, the pool at the base of the falls was an important element. I wanted to include enough of it so you could see where the waterfall was going while also smoothing it out enough with the longer shutter speed. It’s a balancing act of composition and shutter speed to achieve the desired effect.
Post Processing the Image
As I mentioned above, the dynamic range of the scene was too high for a single frame to capture. I ended up blending two shots together to tame the harsh light reflecting off the falls. I covered the blending technique in previous posts here and here. The primary area for blending was the upper part of the falls on the right that is in full sun. In the normal exposure the highlights are completely white, or blown out, as we say. There is no detail there so no Photoshop magic will bring them back. In the -2 stop frame there was detail left so blending portions of that frame with the normal exposure frame was necessary. Big areas of pure white or pure black detract from a photograph and pull the eye towards the “defect”. You don’t want that.
I pulled up the shadow values in the rocks on the sides and raised the greens a bit at the top of the image to balance the light levels globally. The tree branches on the far right are in full sun so they needed to be toned down a bit as they were a bit harsh. A variety of contrast tweaks and some selective sharpening and the image was done.
Final Thoughts
As I mentioned in the opener as well as last weeks post, smoke from western wildfires is making photography very difficult. We have had to change our plans substantially as a result. We were planning on spending many weeks in the Canadian Rockies but after 10 days there it became clear that the smoke levels were going from bad to worse. Some days you could barely see the sun. See my Instagram post for some examples. Even shooting intimate landscapes was getting hard as the light quality was getting very poor. So we bailed. Off to find some relatively smoke free landscapes. That may be hard in the West.
The image of Virginia Falls was made before the smoke levels had gotten really bad. It was hazy but it didn’t interfere with shooting waterfalls. So I thought a look back to clearer views was in order. I hope you enjoyed the image above. Karen and I enjoyed the hike to get the image. And yes we had our bear spray.
As always, you can see higher resolution images on our Facebook page. Please give us a like while you’re there.
Nikon D810 with Nikkor 24-70mm at 38mm. f/16 at 1.3 seconds. ISO 31.
Subscribe and Get Free E-Book!